Elementor's Form widget (in Elementor Pro) collects messages, not appointments. It can't show which times are free, and it can't stop two people from booking the same slot. That's why most Elementor sites end up embedding Calendly in an HTML widget, which means a second account, a monthly plan for some features, and your clients' details stored on someone else's service.
This guide uses Bookira, a free booking plugin we make for people who work one-on-one. Since version 1.4 it comes with its own Elementor widget, so the booking form is just another element on your page.
What you need: WordPress 6.0 or newer with Elementor (the free version is enough) and about ten minutes. No code.
Step 1: Install Bookira
- In your WordPress admin, go to Plugins → Add New Plugin.
- Search for Bookira, click Install Now, then Activate.
Step 2: Create a meeting type and check your hours
Go to Bookira → Meeting Types → Add New and create what clients can book, for example a 15-minute intro call or a 60-minute consultation. Each one has its own length, location (a video link, phone number or address) and a short description.
Then open Bookira → Availability. A new install takes bookings Monday to Friday, 9:00 to 17:00; change the days and hours to yours. Clients only ever see times that are actually free.
The full setup guide covers meeting types, availability, emails and reminders in more detail.
Step 3: Drag the Bookira Booking widget onto your page
- Open the page where clients should book, or create a new one, and click Edit with Elementor.
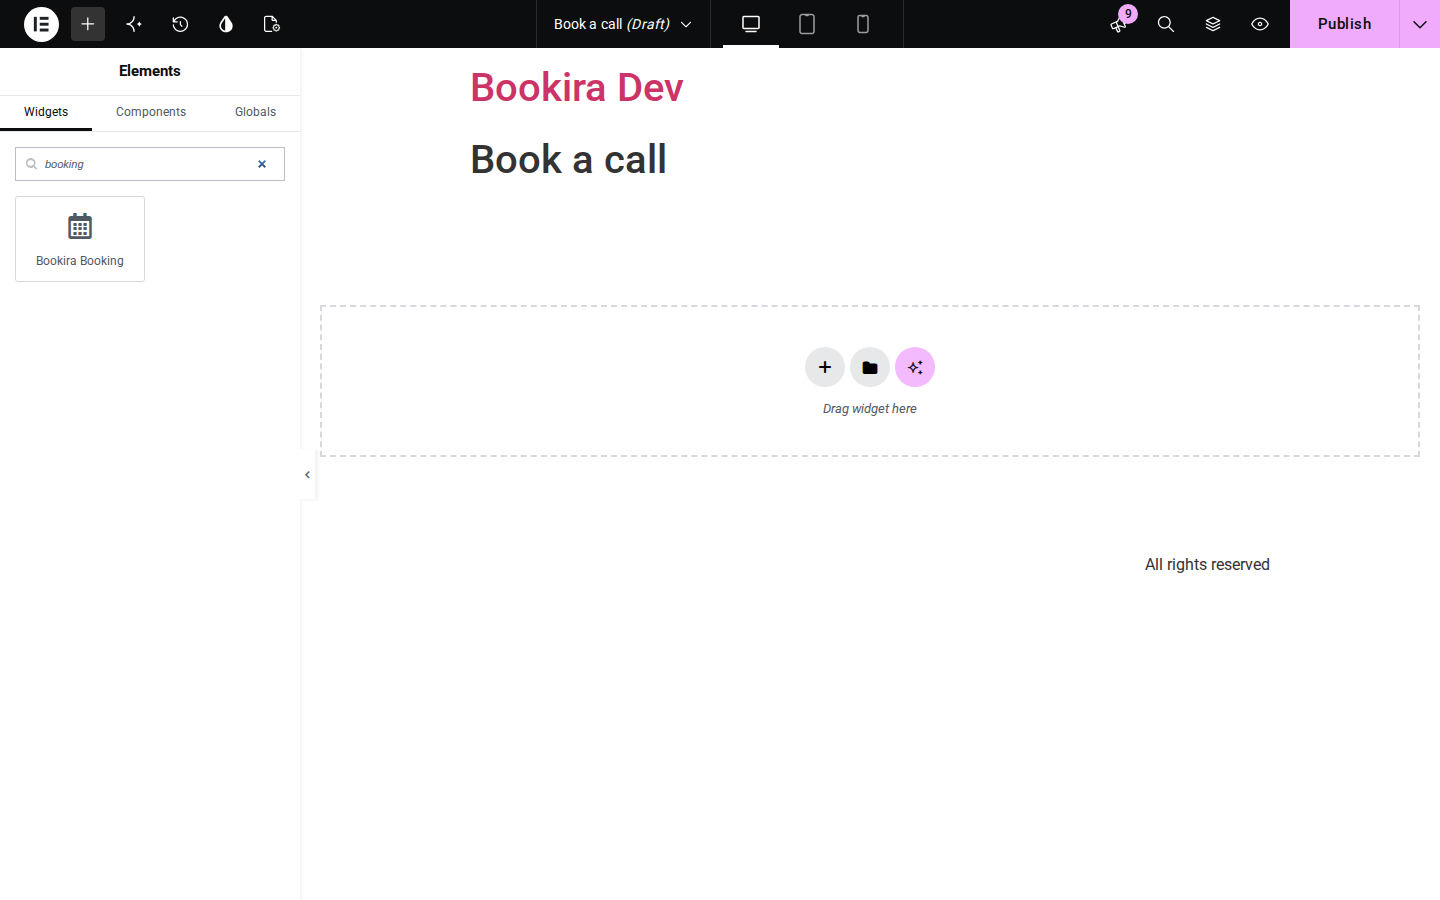
- In the Elements panel, search for booking.
- Drag Bookira Booking into a container, like any other widget.
Step 4: Choose what the form shows
Click the widget to open its settings in the left panel:
- Meeting type: show every meeting type, or only one. One per page works well when each service has its own page, for example a “Consultation” page that books only consultations.
- Look: the Bookira card (one step at a time, in the two colours you pick under Bookira → Settings) or a plain layout that matches your theme. Either way it uses your theme's fonts.
- Show title and intro: turn the heading off if your page already has one, or write your own title and intro.
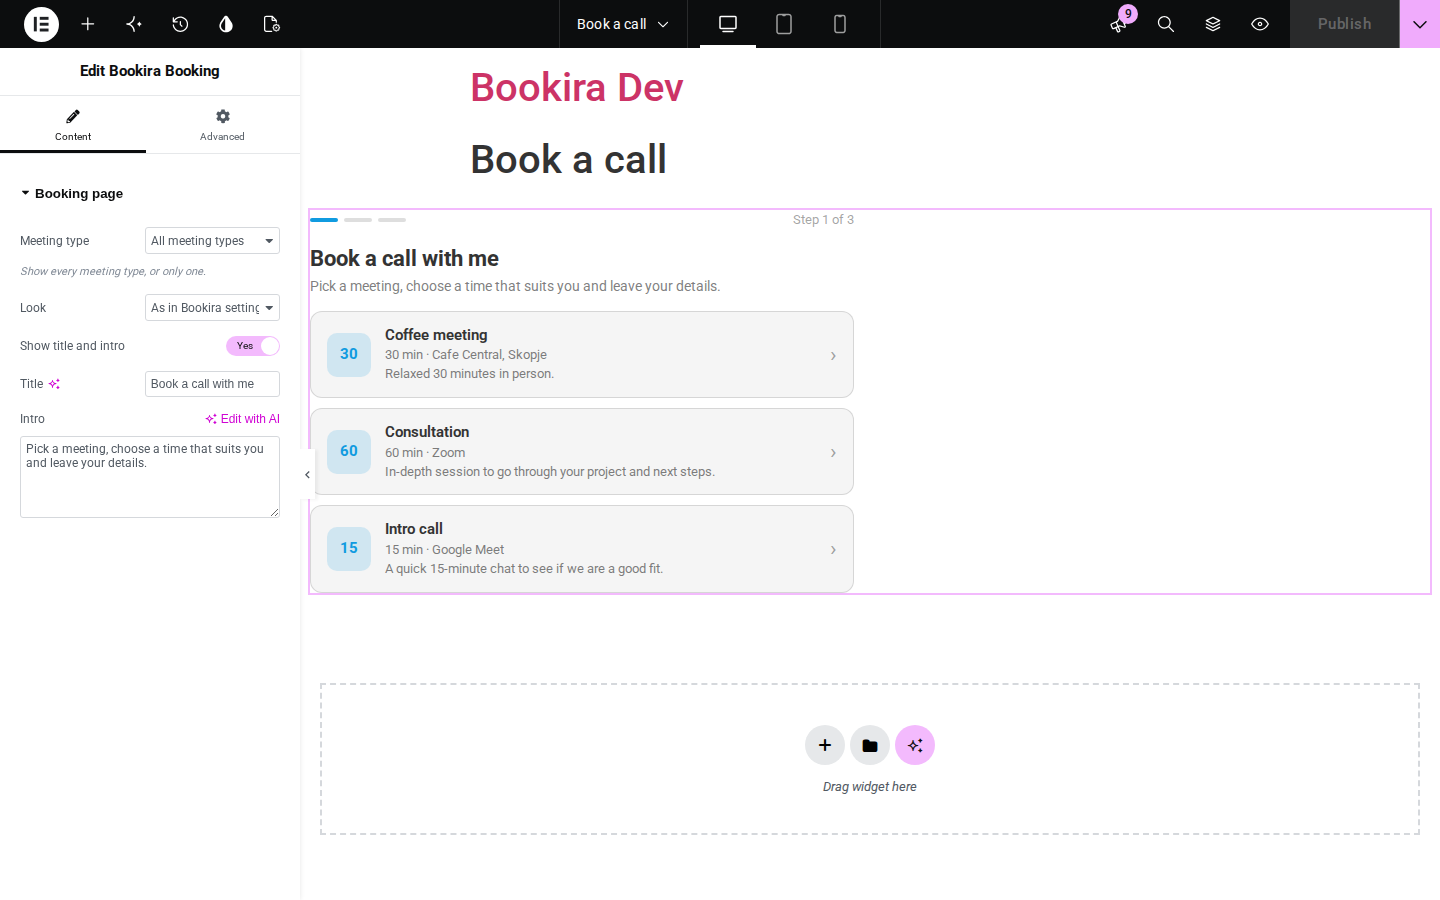
The preview in the editor is the real booking form, so what you see is what your clients get.
Step 5: Publish and try it yourself
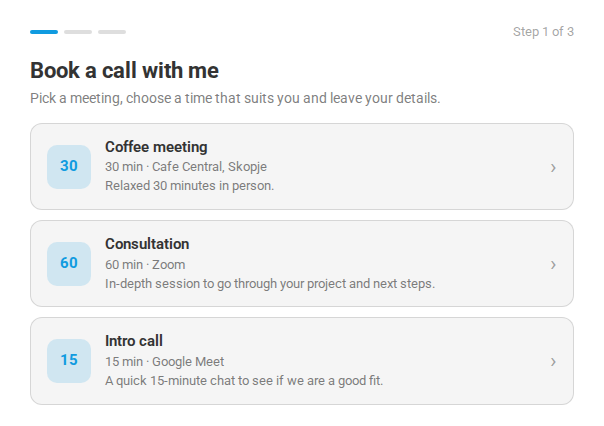
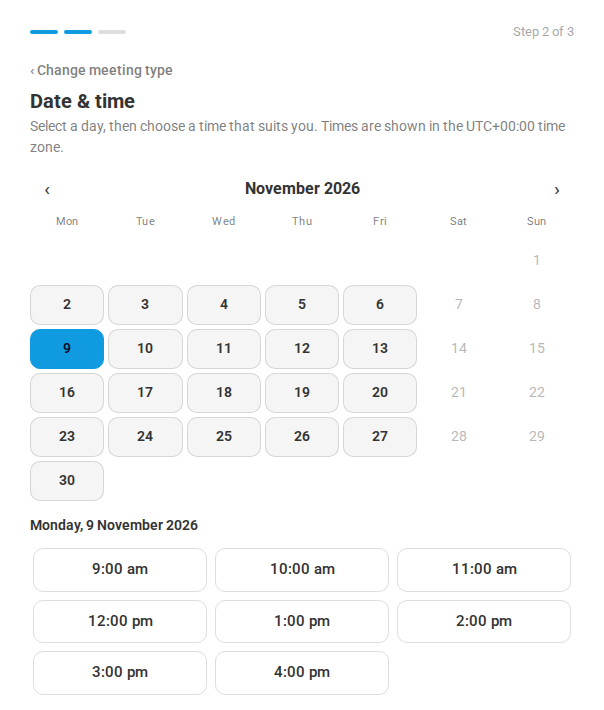
Click Publish, open the page and make a test booking with your own email address. Your clients go through three short steps: pick a meeting type, pick a date and time, and enter their name and email. They don't need an account.
Each booking arrives as pending and you get an email. Confirm it under Bookira → Dashboard, and your client receives a confirmation with a calendar invite (.ics) for Google Calendar, Outlook or Apple Calendar.
Calendly embed or a booking widget?
Embedding Calendly in an Elementor HTML widget works, and it's the right choice if you already pay for Calendly and need its integrations. A native widget is simpler if you don't:
- No second account for you, and no sign-up for your clients.
- It looks like your site, with your fonts and colours, instead of an iframe with someone else's design.
- Bookings stay in your WordPress database, not on an outside service.
- No monthly fee. Bookira is free and open source.
What it doesn't do
Bookira is deliberately small. It doesn't take payments, it doesn't sync with Google Calendar both ways, and it's built for one person rather than a team. If you need those, see our comparison of booking options for WordPress.
Not using Elementor?
The same booking form is available as a Bookira Booking block in the WordPress block editor, and as the [bookira_booking] shortcode for any other page builder.